How to confirm that a 240mm or 360mm radiator will actually fit your PC case
The size printed on a radiator describes its fan class—not its complete external dimensions. Accurate compatibility requires checking length, width, total installation depth, tube clearance, nearby components, and the exact mounting position.
The SoftJean Editorial Team reviewed current case-support pages, radiator specifications, AIO dimensions, and manufacturer installation restrictions. Always compare the exact case revision and cooler model because products sharing the same nominal size can differ.
A case specification that says “supports 360mm radiators” is only the beginning of the compatibility check. The radiator may fit at the front but not at the top. A standard-thickness model may fit while a thicker design collides with the motherboard, memory, graphics card, or power-supply shroud.
The safest method is to compare official dimensional drawings, measure the real mounting area, and perform a dry mock-up before installing the motherboard or filling a custom loop.
The most important rule
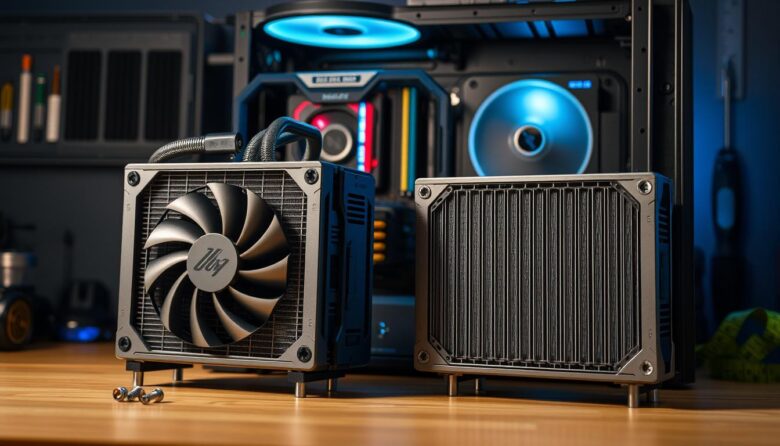
Never use “240mm” or “360mm” as the complete physical measurement. A 240mm radiator normally aligns with two 120mm fans, while a 360mm radiator aligns with three. The radiator end tanks extend beyond those fan positions, so the actual product is longer than its nominal label.
Measure the complete radiator, including end tanks, ports, tube exits, and protruding caps.
Add radiator thickness, fan thickness, brackets, spacers, guards, and cable clearance.
A case may accept a 360mm radiator at the front but only a 240mm radiator at the top.
Check memory, VRM heatsinks, graphics card, storage cages, PSU shroud, and tube routing.
A panel may have mounting holes for two or three 120mm fans while lacking room for radiator end tanks, ports, tubes, screws, or the combined radiator-and-fan thickness. Use the case manufacturer’s radiator specification rather than counting fan holes alone.
What 240mm and 360mm radiator sizes really mean
| Nominal size | Fan positions | Typical product behavior | What must be checked |
|---|---|---|---|
| 240mm | Two 120mm fan positions | Actual radiator length is normally greater than 240mm because of the end tanks | Complete length, width, thickness, tube exit, fan stack, and nearby components |
| 360mm | Three 120mm fan positions | Actual radiator length is commonly close to 395–400mm, but the exact model controls | Full internal mounting length, end clearance, fan stack, GPU space, and case position |
For example, one current 240mm AIO family uses a radiator measuring 277mm long, while its 360mm version measures 396mm long. Another performance-focused 240mm model measures 277mm long but uses a 38mm-thick radiator instead of a more conventional 27mm design.
Two 240mm coolers can share the same fan format while differing in radiator thickness, width, tube length, port position, pump-block height, controller requirements, and complete installation depth.
The three measurements that decide whether a radiator fits
Actual radiator length plus enough space for tube exits, fittings, fill plugs, wiring, nearby panels, and installation movement.
Radiator thickness plus fan thickness, mounting bracket, gasket, grill, screw head, and cable clearance.
Actual radiator width plus ports, fitting collars, frame lips, offset rails, motherboard components, and side-panel clearance.
Example depth calculation
A radiator measuring 27mm thick with 25mm fans creates a basic stack of approximately 52mm. That does not yet include a thick fan grill, vibration gasket, case bracket, protruding screw head, cable bend, or extra fan row.
A 38mm radiator with approximately 25mm fans creates a basic stack near 63mm. That difference can determine whether a top-mounted cooler clears the memory and motherboard heatsinks.
Measure the real obstruction. Ten unused millimeters above one part of the motherboard may not help when a VRM heatsink or memory module reaches into another section of the radiator path.
Step-by-step radiator compatibility check
Identify the exact case model and revision
Record the full product name, size, revision, and regional variant. Cases with similar names can use different internal frames, fan brackets, front panels, or radiator limits.
Download the case manual and radiator-support page
Look for position-specific limits for the top, front, side, bottom, and rear. Note maximum radiator size, width, thickness, length, motherboard-component height, GPU restrictions, and storage-cage requirements.
Record the exact cooler or radiator dimensions
Use the official product page or dimensional drawing. Write down radiator length, width, thickness, tube length, tube-exit position, pump-block height, fan dimensions, and any controller or cable requirements.
Calculate the complete radiator-and-fan stack
Add radiator thickness and fan thickness. Include a second fan row only when planning push-pull. Also account for mounting rails, guards, brackets, spacers, and connector clearance.
Inspect the proposed mounting position
Remove the relevant panels and filters. Measure from the mounting plane to the nearest obstruction at several points rather than measuring only the center of the case.
Check the path of the radiator end tanks
Verify that both ends can pass between the case frame, front I/O assembly, power-supply shroud, motherboard tray, cable cover, and removable brackets.
Check tube or fitting exit clearance
An AIO needs room for its tubes to leave the radiator without being crushed or sharply bent. A custom radiator needs additional room for fittings, rotary adapters, valves, or plugs.
Check nearby hardware in its final position
Include the real motherboard, memory, graphics card, vertical GPU bracket, storage cages, power-supply cables, fan controllers, and cable covers—not an empty-case measurement.
Verify screw and mounting-rail alignment
Ensure the radiator can align with the intended slots without forcing it against another component. Use only the screw length approved for the radiator and fan arrangement.
Perform a dry mock-up before final assembly
Install the radiator and fans without applying power or filling a custom loop. Confirm panel closure, cable access, tube reach, graphics-card clearance, memory access, and fan rotation.
Top-mounted radiator compatibility
Top mounting can create a clean exhaust path and usually keeps the radiator above an AIO pump. It is also the position most likely to conflict with the motherboard, memory, and CPU power connectors.
Measure vertical depth
- Measure from the top radiator mounting plane toward the motherboard.
- Include the full radiator-and-fan stack.
- Check the tallest memory module.
- Check both VRM heatsink areas.
- Check the rear I/O cover and decorative motherboard shields.
- Check the CPU power connector and cable bend.
Measure lateral offset
- Determine whether the top slots move the radiator away from the motherboard.
- Check whether the radiator width reaches over memory or VRM heatsinks.
- Confirm that fan cables can leave the frame without being pinched.
- Check front-panel USB, audio, lighting, and button assemblies.
- Confirm that the radiator end tank clears the rear case frame.
Case-specific restrictions can be more useful than a general size label. Some cases support a 240mm top radiator but impose a maximum motherboard-component height. Other cases support a 360mm front radiator while limiting the top to 240mm or 280mm.
Pressure against memory, VRM heatsinks, the CPU power connector, or motherboard covers can damage components, prevent proper seating, create vibration, or make later maintenance difficult.
Front-mounted radiator compatibility
Front mounting often provides enough length for a 360mm radiator and gives an AIO access to cooler outside air. The main compatibility risks are graphics-card length, drive cages, power-supply shrouds, front-panel thickness, and tube routing.
Check whether the case’s published maximum GPU length assumes an empty front fan area, standard fans, or no radiator. Use the manufacturer’s radiator-specific limit whenever it is provided.
A long radiator may need to extend into an opening in the power-supply shroud. A drive cage, cover, cable bundle, or closed shroud can block the lower end tank.
Confirm that AIO tubes reach the pump without sharp bends or tension. When possible, keep the top of the radiator above the pump so air can remain away from the pump chamber.
Front-clearance checklist
- Complete radiator length and the height of both end tanks.
- Radiator thickness plus front or rear fan placement.
- Graphics-card length and power-connector bend.
- Vertical GPU mount and riser-cable position.
- Drive cages, storage trays, and power-supply shroud openings.
- Front I/O wiring and fan-controller position.
- Dust-filter and front-panel clearance.
- AIO tube reach and minimum practical bend radius.
- Access to radiator screws after other components are installed.
Some case manufacturers publish GPU clearance with no front radiator, while others provide separate limits for fans and radiators. The internal bracket position and front-panel depth can also change the result. Use case-specific documentation whenever available.
Side-mounted and bottom-mounted radiators
Side mounting
- Check clearance behind the motherboard tray or side chamber.
- Check graphics-card width and power-connector space.
- Confirm that fans do not collide with cable-management covers.
- Check whether the bracket supports radiator end tanks.
- Verify that tubes can reach the pump without crossing fan blades.
- Check side-panel and dust-filter clearance.
Bottom mounting
- Check graphics-card thickness and vertical-mount hardware.
- Check motherboard headers along the lower edge.
- Allow space for fan intake below the case.
- Confirm feet and filters do not restrict airflow excessively.
- For an AIO, avoid placing the radiator below the pump when another supported position exists.
- For a custom loop, plan pump, drain, and tubing access carefully.
A bottom radiator can make the pump the highest point in the sealed loop, allowing air to collect around it. Custom loops use separate reservoirs and pumps, so their layout requires a different compatibility and filling analysis.
AIO and custom-loop radiators need different clearance checks
| Compatibility factor | Sealed AIO | Custom-loop radiator |
|---|---|---|
| Tube connection | Factory-installed tubes leave the radiator at a fixed location | User-selected fittings may extend beyond the radiator in several directions |
| Tube length | Fixed and cannot normally be extended | Selected and cut by the builder |
| Port direction | Normally fixed by the AIO design | May use straight, angled, rotary, offset, or extension fittings |
| Fill and drain access | Normally not user-serviceable | Requires practical fill, vent, drain, and maintenance access |
| Radiator thickness | Fixed as part of the cooler package | Available in slim, standard, thick, and specialized designs |
| Additional components | Pump block, controller, USB, power, and fixed tubes | Pump, reservoir, valves, sensors, fittings, tubing, and possibly multiple radiators |
A 90-degree rotary adapter, compression fitting, drain valve, temperature sensor, or stop plug can require more space than the bare radiator drawing suggests. Model these parts in the final orientation before ordering.
Checking compatibility for multiple radiators
A case may list support for several radiator positions without supporting the maximum size in every position at the same time. Radiators can overlap at the top-front corner, share the same bracket, compete for tube space, or block pump and reservoir mounts.
The front end tank or fans may occupy the same space required by the front section of a top radiator.
Thick radiator stacks can compete with a vertical graphics card, bottom fans, or the side radiator bracket.
A second radiator may consume the mounting rail or floor area originally intended for a pump-reservoir assembly.
- Check the case manual for simultaneous radiator configurations.
- Draw the full radiator-and-fan thickness in every position.
- Include fittings and tube exits at both radiator ends.
- Check whether one radiator must be installed before the other.
- Confirm that motherboard, graphics card, pump, and reservoir remain removable.
- Preserve access to drain and fill points.
- Plan airflow so one radiator does not receive unnecessarily restricted or recirculated air.
Dry-fit workflow before final installation
Remove the relevant case panels and brackets
Open the front, top, side, or bottom mounting area completely. Keep filters, rails, and decorative panels nearby because they must also fit after the radiator is installed.
Attach the intended fans to the radiator
Use the real fan thickness and direction. A bare radiator mock-up does not test the complete installation depth.
Position the assembly without forcing it
Check all end tanks, ports, tube exits, screw rails, nearby connectors, cable covers, and frame lips. The radiator should not need to bend the case or press against hardware.
Install the motherboard and graphics card temporarily when needed
A truly accurate fit check may require the real memory, VRM heatsinks, CPU power cable, graphics card, and power connectors in their final positions.
Test tube routing and panel closure
Gently position AIO tubes or sample custom-loop fittings. Confirm that the side, front, and top panels close without compressing tubes or cables.
Check fan clearance by hand while powered off
Rotate each fan gently to confirm that no cable, bracket, filter, screw, or panel reaches the blades.
Use only the screws approved for the radiator, fan thickness, and mounting arrangement. Do not assume that a longer screw is safer or more secure.
Common compatibility mistakes
A 360mm radiator is longer than 360mm because of its end tanks. The same principle applies to 240mm products.
Memory, motherboard heatsinks, the graphics card, cables, and storage hardware can occupy the same space later.
The radiator may fit by itself while the complete assembly collides with another component.
Performance-oriented products can use substantially thicker radiators and need additional installation depth.
“360mm supported” may mean front only, while the top mount accepts a smaller size.
A radiator can physically mount while the AIO tubes cannot reach the CPU without tension or an unsafe bend.
The published clearance may assume no front radiator or may change with the selected fan and radiator stack.
Two positions may each support a large radiator separately but conflict when used simultaneously.
CPU power, GPU power, fan, USB, SATA, controller, and lighting cables need bending and removal space.
A compatible assembly should not bend the case, compress memory, press against the motherboard, or pinch tubing.
Radiator compatibility worksheet
Radiator and fan measurements
Case and component clearance
Treat the radiator as compatible only when the official case support, exact cooler dimensions, real measurements, component clearances, tube routing, screw alignment, and closed-panel mock-up all agree.
Frequently asked questions
Is a 240mm radiator exactly 240mm long?
No. The label normally describes two 120mm fan positions. The radiator end tanks extend beyond the fan area, so the actual product length is greater and varies by model.
Is a 360mm radiator exactly 360mm long?
No. Many current 360mm products are approximately 395–400mm long, but you must use the exact manufacturer’s dimensions for the model being installed.
If my case supports three 120mm fans, will it support a 360mm radiator?
Not necessarily. The case also needs room for the radiator end tanks, complete thickness, ports or AIO tubes, screws, brackets, and nearby components.
How do I calculate total radiator thickness?
Add the radiator thickness and fan thickness. Include additional fan rows, brackets, gaskets, grills, spacers, and cable clearance when those parts are used.
Will every 240mm radiator fit a case that lists 240mm support?
No. Radiator length, width, thickness, end tanks, port layout, tube position, and fitting protrusion can differ. Case restrictions may also depend on the mounting location.
Why does my top radiator collide with the RAM?
The complete radiator-and-fan stack may extend over the memory area. Radiator width, mounting-rail offset, memory height, motherboard placement, and case width all affect clearance.
Can I mount a 360mm radiator at the front and a 240mm radiator at the top?
Only when the case supports that combination simultaneously. The front radiator end tank may overlap the top radiator, and both stacks may compete for the same corner space.
Should I use a front radiator or a top radiator?
Use the position that provides correct clearance, tube routing, pump orientation, and complete-system airflow. Front intake often gives the radiator cooler air, while top exhaust can create a simple heat-exhaust path.
Can I install a thick radiator wherever a normal radiator fits?
No. A thicker radiator reduces clearance for memory, the motherboard, graphics card, cables, storage cages, and other radiator positions. It may also require suitable fans and more installation depth.
Do slim fans solve every clearance problem?
Slim fans can reduce installation depth, but they may provide different airflow, static pressure, noise, and connector behavior. They do not solve radiator length, width, end tank, or tube-routing conflicts.
Can I place radiator fans outside the case frame?
Only when the case is designed for that arrangement and the panels, filters, screws, cables, and airflow path remain compatible. Do not improvise an external fan location that prevents panels from closing safely.
How much space should I leave around AIO tubes?
Leave enough room for the tubes to follow a relaxed path without kinking, twisting, rubbing against sharp edges, touching fan blades, or pulling on the pump block.
Does front radiator thickness reduce graphics-card clearance?
Often, but the exact reduction depends on the case bracket and how the manufacturer defines its GPU-clearance specification. Use the case’s radiator-specific documentation rather than applying a universal subtraction.
What is the most reliable way to confirm compatibility?
Compare official case and radiator dimensions, measure the real mounting area with the intended hardware present, and complete a dry mock-up with the radiator and fans assembled.
Final compatibility checklist
- The exact case model and revision have been confirmed.
- The case officially supports the radiator size in the chosen position.
- The radiator’s actual length, width, and thickness have been recorded.
- Fan thickness and all brackets or spacers are included.
- End tanks, tube exits, fittings, plugs, and cables have enough room.
- Memory, VRM heatsinks, CPU power cables, and motherboard covers remain clear.
- The graphics card and its power connector still fit.
- Storage cages, PSU shroud, filters, and case panels remain usable.
- The AIO tubes reach without tension or sharp bends.
- Multiple radiators do not overlap or block pump and reservoir mounts.
- The full assembly has been dry-fitted without forcing any component.
Radiator compatibility is not a guess based on the number printed on the box. It is a position-specific measurement problem. When the official documentation, component dimensions, real-case measurements, and dry mock-up all agree, the installation is far less likely to produce an expensive surprise.
- CORSAIR guide to 240mm and 360mm AIO compatibility
- CORSAIR example of tube-length and complete-stack compatibility limits
- Fractal Design Meshify 3 radiator restrictions
- Fractal Design North top and front radiator-clearance guidance
- NZXT H5 Flow position-specific 240mm and 360mm radiator support
- Cooler Master 240mm and 360mm AIO radiator dimensions
- ARCTIC example of a thick 240mm AIO radiator

The SoftJean Editorial Team creates practical guides about PC cooling, liquid cooling systems, AIO coolers, airflow, maintenance, and hardware troubleshooting. Our content is developed through careful research using manufacturer documentation, technical references, compatibility information, and trusted industry sources to help readers make safer and more informed decisions about their computer cooling setups.