I test high-end systems and write in plain terms about keeping aggressive CPUs cool. I often push an Intel Core i9-14900K until temps climb, and I rely on strong liquid solutions to hold clock speeds steady.
The Arctic Liquid Freezer III Pro 360mm stood out in my testing. It managed heat on extreme runs and kept the pump stable under long loads. I also note that a quality cpu block makes a big difference in heat transfer.
When I tune an amd ryzen or amd intel rig, I check radiator fit and case clearance first. I confirm lga 1700 compatibility and monitor fan speeds and noise with an ips display when possible.
I recommend considering a corsair icue or cooler master masterliquid model if you want solid thermal performance and tidy cable routing. Good choices boost performance and reduce thermal throttling during sustained loads.
Key Takeaways
- I recommend verifying radiator fit and case clearance before buying.
- A reliable cpu block and pump improve sustained performance.
- Arctic Liquid Freezer III Pro 360mm performed very well in my tests.
- Check lga 1700 compatibility for newer Intel boards.
- Models from Corsair iCUE or Cooler Master MasterLiquid balance looks and cooling.
Why Cooling Matters for Overclocking
When I push a modern cpu beyond stock speeds, cooling becomes the limiting factor in how far I can go. My goal is stable performance, not short bursts followed by throttled clocks.
Thermal Throttling Risks
“If the temperature climbs past safe limits, the system will shave clock speed to protect the silicon.”
Thermal throttling kicks in when your cpu hits its max temperature. That sudden drop in frequency defeats the point of a tune and can ruin benchmark runs.
Modern chips like the Intel Core i9-14900K produce so much heat that many standard air coolers struggle to keep temps in check.
Maintaining System Stability
I rely on a high-performance liquid cooler or a stout air cooler depending on the build. In long gaming or rendering sessions, a steady pump and properly set fans keep temperatures stable.
- Reliable pump movement matters — it transports the coolant and keeps thermal transfer consistent.
- Check fan curves and radiator airflow; even top-tier aio models fail without correct fan setup.
- Brands like Cooler Master often supply the consistent cooling level needed for extended runs.
“I recommend monitoring temp and fan behavior closely; small changes in airflow can prevent big failures.”
Understanding the Best AIO Water Coolers for Overclocking
I look for coolers that keep a high-end cpu steady during heavy gaming and rendering sessions. A modern liquid cooler often pairs an integrated pump and cpu block, which speeds installation and reduces leak risk.
The market now mixes utility with flair: some units add LCD panels and customizable rgb lighting. That design shift matters if you want control over noise and pump speed through bundled software.
Choosing between a liquid cooler and air coolers depends on case clearance, thermal goals, and how hot your target cpu runs under load. In my tests, a well-designed liquid solution delivers lower temps than most air options during sustained stress.
- Check lga 1700 compatibility before you buy; mounting affects fit and performance.
- Look for a quality cpu block — it directly impacts heat transfer.
- Brands like Corsair iCUE and Cooler Master offer models that balance cooling, noise control, and visual features.
“A good liquid cooler gives you the thermal headroom I need to push a top cpu without constant throttling.”
Top Tier Performance with Large Radiators
A big radiator changes how a system handles sustained thermal stress. With more surface area, heat moves out of the loop faster. That gives the cpu longer safe run times under heavy load.
Handling High Wattage Loads
360mm radiators offer a clear performance edge over 240mm or 120mm units. I find a 360mm radiator cuts peak temperature and keeps fans at lower RPMs during gaming and rendering.
Less fan speed equals lower noise, and a less stressed pump often lasts longer.
- I recommend a Cooler Master radiator when you need proven thermal headroom.
- High-static pressure fans matter; they push air through dense fins more efficiently.
- Always check your case to confirm a 360mm radiator will fit before buying.
| Radiator Size | Surface Area | Typical Noise | Best Use |
|---|---|---|---|
| 120mm | Low | High | Small builds, light duty |
| 240mm | Moderate | Moderate | Mid-range cpu cooling |
| 360mm | High | Low (at similar cooling) | High-wattage systems, gaming, sustained loads |
“I’ve seen a 360mm setup keep temps stable where smaller radiators could not, especially during long stress runs.”
Balancing Aesthetics and Thermal Efficiency
I value rigs that blend striking looks with real thermal muscle. Modern builds can pair an ips display and rgb lighting with a compact radiator without losing cooling headroom.
When I choose a liquid cooler, I check how the block, pump, and fans work together. A clean layout makes airflow more predictable and keeps temperatures down.
Noise management matters. I use bundled software like corsair icue or vendor tools on a master masterliquid unit to tune fan curves. That keeps the system quiet during gaming while preserving performance under sustained heat.
- I prefer aio coolers with well-designed radiators that include subtle lighting.
- Good fans and a reliable pump deliver steady cooling without constant ramping.
- Pick a cooler that complements your build — looks should support, not replace, thermal performance.
“Style and substance coexist; you don’t have to sacrifice cooling to get a stunning PC.”
Budget Friendly Options for Enthusiasts
I’ve found that modestly priced units can meet the needs of most gaming and productivity builds. Many budget liquid cooler models deliver reliable thermal control without a premium price tag.
ID‑Cooling FX360 INF and similar entries often offer a sturdy pump and decent fans. In my testing they matched adequate cooling performance during long sessions.
When I’m saving cash I tend to favor a Cooler Master MasterLiquid model. It gives good value and usually includes a reliable pump and user-friendly mounting.
“You can save money on the cooler and still keep your CPU safe during intense gaming runs.”
- Cooling performance from budget models is often enough for mainstream high-wattage chips.
- Check published noise figures; some affordable units use louder fans at high RPM.
- Read reviews to confirm that the pump and fans maintain steady performance under load.
Innovative Designs for Component Cooling
New cooling concepts now focus on component-level heat control as much as CPU temps. Manufacturers are adding parts that blow air across VRMs, RAM, and the surrounding board to improve overall stability.
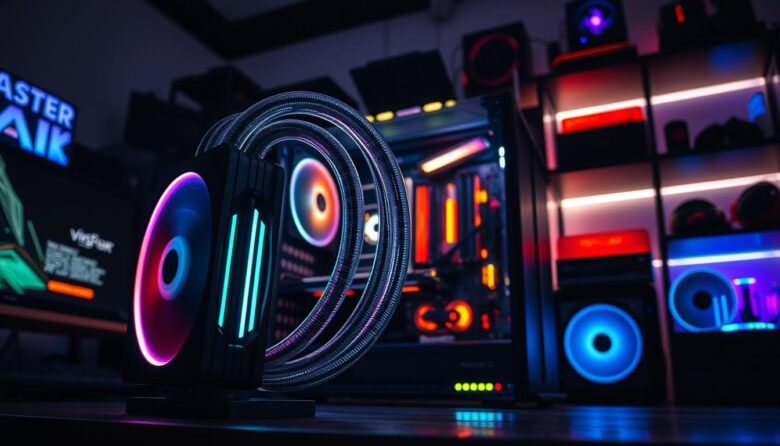
 cooling solution amidst a high-tech environment. In the foreground, a sleek AIO water cooler with illuminated RGB features rests on an open computer case, with clear tubing showcasing the coolant flow. In the middle ground, a high-end CPU is mounted on a motherboard, surrounded by sophisticated heat sinks and capacitors, highlighting the cooling components' scale and design. The background features a softly lit workspace with circuit diagrams and cool-toned lighting that evokes a futuristic, innovative mood. The composition should be shot from a slightly elevated angle, emphasizing the intricate details of the cooling system while maintaining a clean and professional aesthetic.")
VRM and RAM Cooling Benefits
The Silverstone IceMyst uses stackable fans to actively cool VRMs and memory. I find that this extra airflow reduces stray heat and helps the cpu maintain sustained clocks during long gaming sessions.
A targeted fan over the power delivery area can lower temps without raising case noise dramatically. That keeps the system stable under heavy load.
Refillable Loop Advantages
Refillable loops let you service an aio liquid cooler over years instead of replacing it. I value refill ports and modular fittings because they extend life and improve long-term performance.
- I recommend a Cooler Master MasterLiquid or a Corsair iCUE model when you want strong cooling and tidy RGB lighting.
- A well‑designed cpu block, a quality radiator, and efficient fans are essential for reliable performance.
“Innovative designs give you more control over heat and noise, which keeps your rig running cleanly under heavy stress.”
Compact Solutions for Smaller PC Cases
Small cases demand smart cooling choices, and compact solutions often win that fight. I use compact liquid cooler models when a 360mm radiator won’t fit. The Lian Li Galahad II LCD 280mm is a practical example that slides into tighter builds while keeping cpu temps low.
In a small form factor build, the right aio matters for sustained performance. Many compact aios deliver strong cooling and low fan noise. The pump and fan behavior on these units is often well-tuned for quiet gaming rigs.
I also test compact air coolers, and I find them easier to install in cramped cases. Still, a slim radiator with good fans can move more air and cut heat better than bulky single-tower designs.
“I always check case dimensions first — compact solutions save time and prevent fit issues.”
| Factor | Compact Liquid Cooler | Air Cooler |
|---|---|---|
| Fit in small case | High (280mm options) | Medium (height limits) |
| Noise | Low to moderate (controlled pump/fans) | Variable (fan RPM dependent) |
| Installation | Generally easier in tight spaces | May obstruct RAM or tall heatsinks |
| Performance | Good to very good for gaming and productivity | Good for moderate loads |
- Check dimensions before buying to ensure radiator fit.
- I often recommend a Cooler Master MasterLiquid when you need compact, reliable cooling.
- Compact solutions expand the market for portable, high-performing builds.
Essential Factors for Successful Overclocking
I treat each voltage tweak like an experiment: small changes, careful notes, clear results.
Monitor temperature closely. I set 90C as my hard limit to avoid thermal throttling. Hitting that mark means I back off or improve my cooling setup.
Use tools like AMD Ryzen Master or Intel XTU to test stable clock speeds. These suites help me find safe limits and log results after every change.

Patience matters. I run stress tests after each adjustment to confirm the system stays stable. I also watch fan noise — rising volume often signals higher thermal load.
- Save settings and test each step.
- Keep a log of voltages, temperatures, and achieved speeds.
- Prioritize a solid cooling foundation before chasing high clocks.
“I’ve learned that careful testing and good tools separate a reliable tune from a flaky result.”
| Factor | Recommendation | Why it matters |
|---|---|---|
| Temperature limit | 90°C | Prevents thermal throttling and protects silicon |
| Testing software | AMD Ryzen Master / Intel XTU | Finds stable speeds and logs changes |
| Stress testing | Multi-hour runs | Confirms long-term stability under load |
| Documentation | Keep a log | Tracks progress and helps revert bad settings |
Managing Airflow and Thermal Interface Materials
A tidy case and correct fan orientation often cut peak temps more than swapping parts. I start with airflow before I touch voltages or fan curves.
Optimizing Case Fan Placement
I position fans so cool air reaches the radiator and hot air exits the top or rear. That keeps the pump and fans from working harder and lowers noise during long sessions.
- Balanced intake and exhaust prevents pockets of hot air around the cpu.
- Pull cool air through the radiator rather than exhausting through it when possible.
- Test different fan configs — small changes can drop temperature by several degrees.
Thermal interface material matters. I use a thin, even layer of high-quality paste to improve heat transfer from the cpu to the cooler plate and pump.
| TIM Type | Ease of Use | Thermal Conductivity | When I use it |
|---|---|---|---|
| Silicone-based paste | Easy | Moderate | Daily builds |
| Metal-based paste | Moderate | High | High-performance rigs |
| Carbon/ceramic paste | Easy | High | Quiet, long-term setups |
“Good airflow and the right paste often beat a quick hardware swap when you’re chasing lower temps and less noise.”
Installation Tips for High End CPUs
Installation details can make the difference between a calm, cool system and one that struggles under load. I start slow and follow the manual step by step.
Mount the contact frame on LGA 1700 when applicable. I have found that adding the contact frame improves cooling performance and gives a more consistent cpu block pressure.
Tighten screws evenly. I tighten the cpu block in a cross pattern so pressure stays uniform. This reduces hotspots and lowers noise caused by poor contact.
- I position the pump to avoid air traps; correct orientation prevents gurgles and pump noise.
- Connect the fans to the right headers to control speed and rgb lighting from your board.
- Check the Cooler Master MasterLiquid instructions and confirm you have all mounting pieces before you begin.
“I always double-check pump and fan operation before the first boot — a quick test saves headaches later.”
| Step | Why it matters | Quick tip |
|---|---|---|
| Contact frame (LGA 1700) | Improves thermal contact | Install before applying paste |
| Pump orientation | Prevents air bubbles and noise | Keep inlet/outlet aligned per manual |
| Fan headers | Allows PWM control and synced RGB | Use CPU_FAN / PUMP headers |
Take your time. A clean mount and solid connections cut noise, improve cpu temperature, and keep the pump running quietly over long sessions.
Conclusion
Your cooling choice sets the ceiling on sustained performance during heavy workloads. Choose a sturdy cooler and a roomy radiator if you want long, quiet runs under load.
Proper installation, balanced airflow, and a good thermal interface material matter as much as the hardware itself. I recommend testing fan curves and pump behavior before you finalize a tune.
Whether you aim for a budget model or a premium unit with extra features, follow the steps here to keep your CPU stable and cool. Happy building—enjoy the added performance and reliability your upgrade brings.
FAQ
What should I prioritize when choosing a liquid cooler for overclocking a high-end CPU?
I focus on radiator size and fan quality first. Larger radiators like 360mm or 280mm move more heat and keep temps stable under heavy loads. I also check pump reliability, fan RPM range, and the cold plate design to ensure the cooler handles sustained wattage from Intel or AMD chips.
How do thermal throttling risks affect an overclocked system?
Thermal throttling cuts CPU frequency when temps climb too high. I avoid that by ensuring my cooling solution can dissipate peak heat output, using good case airflow, and applying a quality thermal interface material so the CPU maintains performance under extended stress tests.
Can a compact cooler handle an overclocked CPU in a small case?
Compact radiators can work, but I temper expectations. Smaller radiators have less heat capacity, so I pair them with high-performance fans, optimize case airflow, and often aim for milder overclocks to keep temperatures and noise in check.
Are large radiators always better for high wattage loads?
Generally yes—bigger radiators spread heat across more surface area, improving cooling under heavy loads. I recommend 360mm or 420mm setups for extreme overclocks, while 240–280mm can suit midrange overclocks if airflow and fan choice are strong.
How important is pump noise and reliability when selecting a cooler?
Very important. I look for a quiet, reliable pump with minimal vibration and a solid warranty. A noisy pump detracts from the system experience, and pump failure risks high temps quickly, so I prioritize established brands with good reviews.
Should I worry about RGB and aesthetics when optimizing cooling?
RGB doesn’t change thermal performance, but the cooler’s design can. I pick models that balance looks and function—shrouds or shims shouldn’t obstruct airflow. If aesthetics matter, choose a cooler that offers RGB without sacrificing radiator and fan efficiency.
What role do VRM and RAM cooling play in overclocking stability?
VRMs and RAM can limit overclocking if they overheat. I ensure adequate airflow over motherboard power delivery and consider coolers or heatsinks that target those components. Some coolers and brackets improve VRM airflow or include dedicated fans to keep voltages stable.
Are refillable loop designs worth considering over sealed units?
Refillable loops offer superior cooling and customization but require maintenance and know-how. I recommend them if you want top-tier thermal performance and are comfortable with periodic checks and refills. For plug-and-play reliability, sealed liquid systems are easier.
How do I optimize case fan placement to complement my cooler?
I set up a balanced intake-exhaust layout: front and bottom intake, top and rear exhaust. Ensure positive or neutral pressure to reduce dust. Match fan curves so radiators get consistent airflow, and avoid obstructing intake paths with cables or drive cages.
What thermal interface material (TIM) should I use when installing a high-performance cooler?
I use a high-quality thermal paste with good conductivity and low thermal resistance. Brands like Arctic, Noctua, and Thermal Grizzly are reliable. Apply a pea-size or thin line depending on CPU IHS size and follow the cooler maker’s mounting guidance for best contact.
Any installation tips for mounting coolers on LGA 1700 or latest AMD sockets?
I always check socket compatibility and use the included brackets or updated mounting kits. Tighten screws in a cross pattern to ensure even pressure on the CPU block. Verify BIOS settings after install and monitor temps during the first stress test to confirm proper contact and pump/fan operation.
Can budget-friendly coolers provide good performance for moderate overclocks?
Yes—I’ve found many midrange models that balance cost and cooling. Choose a proven 240mm or 280mm unit with quality fans and a reliable pump. Pair it with good case airflow and realistic overclock targets to get solid performance without a premium price tag.
How do I judge whether a cooler will fit my case and components?
I measure radiator length, thickness (with fans), and clearance for memory and VRM heatsinks. Check the case’s radiator support and motherboard layout. Manufacturers list compatibility, but I double-check dimensions to avoid surprises during installation.

Hardware enthusiast and cooling specialist sharing real-world tips on water cooling, thermal performance, and custom PC builds.